|
This section is for use in tuning FACTORY GM tripowers
with ROCHESTER CARBURETORS. DO NOT ASSUME THAT THIS SECTION WILL HELP IF
YOU ARE USING A ‘HOME-BREW’ TRIPOWER, OR ONE USING AFTERMARKET CASTINGS!!!
Tripower was used by General Motors on Cadillac (1958-1960); Chevrolet
(1958-1961); Oldsmobile (1957, 1958, and 1966); and Pontiac 1957-1966).
More often than not, there are more than one tripower per year and make for
different engine/transmission configurations. The information below is
general. The factory shop manual is an excellent resource when working on
these carburetors.
Get the correct parts!!! With many generic “one kit fits all”, repair kits
on the market; it is difficult for the novice to know what to use.
Components that one might not consider which can cause issues are: fuel
valves, accelerator pumps, gaskets, and power valves. Discussing these
components:
Fuel valves - I am aware of 4 styles of fuel valves that are being sold:
(A) the conventional pointed fuel valve (our second favorite type); (B) the
aluminum plunger with a neopreme disk inserted in the plunger that seals on
a inverted flare seat (our favorite, but unfortunately, the manufacturer is
now out of business and no new complete units are available); (C) the 2
ball valve (these tend to hold pressure well, but we have had issues for
full fuel flow in high performance applications, and also have had these
flood profusely on vehicles not driven daily – we will not use these
valves); and (D) an imitation of the valve (B) where a wafer containing the
neopreme disc is placed between the seat and the plunger (we have seen the
wafer get stuck causing profuse flooding, we will not use this valve). If,
when redoing a setup containing valve (B), we can include new neopreme
discs in our kits. Since the neopreme disc is the only wear item, replacing
this disc and cleaning the plunger and seat will restore the unit.
Accelerator pumps – in the good old days, accelerator pumps were made from
leather. Somewhere along the way it was determined that accelerator pumps
could be made much cheaper with neopreme, rather than leather skirts. BE
(before ethanol) the neopreme pump would last maybe 3~5 years, while
leather will last indefinitely. Neopreme pumps used with ethanol will fail
rather quickly, while the leather pump will still last indefinitely. If at
all possible, purchase kits with leather pumps. In fact, if your old
accelerator pump is leather, try soaking it in light machine oil rather
than replacing it with a modern neopreme pump.
Gaskets – during the 1957 model year, Rochester began using a slotted
throttle body to bowl gasket ON SOME MODELS ONLY! For the carburetor to
function properly, it is imperative that the PROPER throttle body gasket is
used. Using a solid gasket on a carburetor designed for the slotted gasket
WILL result in hot idle issues. http://www.thecarburetorshop.com/Ventedgaskets.htm
Power valves – Rochester used a number of different calibrations and two
different plunger lengths for power valves on tripower carbs along. Using
the incorrect valve will create mixture-timing issues.
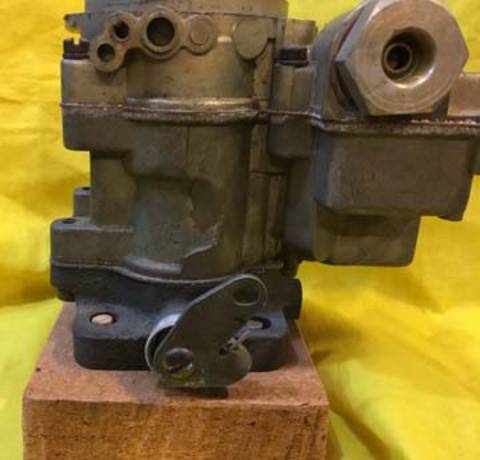
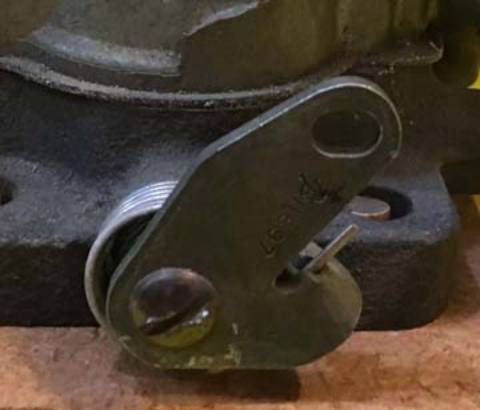
Linkage – one of the most common causes of idle issues
with tripower is the addition of AFTERMARKET progressive linkage (the
factory progressive linkage works fine). The factory linkage, either vacuum
or progressive, has a horizontal slot in the arm of either the front or the
rear (generally the front) carburetor on the passenger side. The other carb
will have a round hole in the arm. The horizontal slot was used to
compensate for the coefficient of linear expansion. The front to rear rod
was adjusted such that the rod was in the exact center of the slot. Most
aftermarket linkage bolts solidly to the arms, and will cause either the
front or rear carb to always be very slightly open, but open sufficiently
to effect idle quality.
UNLESS YOU HAVE PRIOR KNOWLEDGE, ALWAYS BUILD THE CARBURETORS TO STOCK
SPECIFICATIONS FIRST! NOW YOU HAVE A BASELINE IF MODIFICATIONS ARE
NECESSARY!
OK, you rebuilt the carbs using correct parts to stock specs and now you
are ready to install and tune the carburetors. Unless you are a carburetion
specialist, install the center carburetor ONLY and install blockoff plates
to block off the end carburetors. If you are a carburetion specialist, you
already knew that, and would have done so without being told..
Adjust the idle. Using a vacuum gauge and setting for the highest vacuum
can cause hesitation (see the paragraph in “Troubleshooting” on BOG). You
cannot adjust the idle unless the engine is fully warm. If you blocked off
the intake crossover, this could mean 30 minutes or more. When the engine
is warm enough to properly set the idle, the choke butterfly will be in the
vertical or wide-open position. It is important to understand the idle circuit
to properly adjust the idle. Contrary to popular belief, the idle mixture
control screws DO NOT adjust the mixture. The mixture delivered by the
carburetor is controlled by the idle tubes (gasoline jets), and the idle
air bleeds (air jets) in the carburetor. The idle mixture control screws
control the VOLUME of the preset mixture. An analogy would be a shower
where you first set the temperature and then adjust the pressure. In this
analogy the temperature (mixture) would be preset in the carburetor, and
the pressure (volume) is set by the mixture control screws. For BEST
results, the clearance from the throttle plates to the throttle body will
be about 0.020 (20 thousandths) at idle. If the tripower is being used on
other than the stock engine (455 instead of a 389, or a very radical cam),
it may be necessary to modify the idle circuit. There are two common
possibilities in the modification of the idle circuit (if others are
needed, your engine is too radical for the scope of this discussion).
REMEMBER BEFORE MAKING ANY MODIFICATIONS THAT THEY PROBABLY ARE
PERMANENT!!!
Idle modifications - the two common modifications are: enrichening the fuel
mixture and increasing the idle air supply. Enrichening the fuel mixture
MAY be necessary when using ethanol or if the engine has been built to a
slightly higher tune, or headers have been added. Increasing the idle air
supply MAY be necessary if the engine has been built much more radical than
stock or if the displacement has been significantly increased. The goal of
either modification is a steady idle with the mixture screws from ¾ turn to
1 ½ turn from fully seated, and about 0.020-inch clearance from the
throttle plates to the throttle bore. The idle mixture control screws in
these carburetors are the pre-smog short taper. 1 and ½ turns from lightly
seated, and the valves are WIDE OPEN.
To enrich the idle mixture, one must first measure the inside diameter of
the idle tubes. One can then drill these tubes oversize. We recommend NO
MORE than 0.005-inch increase in the diameter. The first attempt may be
made at plus 0.002 inch. If this is not sufficient, then subsequent
attempts should be made in 0.001-inch increments not to exceed 0.005 inch
total.
To increase the idle air supply, one may drill small holes in each of the
throttle plates of the center carburetor. If one observes the throttle
plates while attached to the throttle shaft, the throttle plate will appear
as two hemispheres. For best results, the holes should be drilled in the
center of the hemisphere AWAY from the idle mixture control screws. One
should start with a 0.060-inch hole (60 thousandths). If necessary, the
holes may be increased in size, not to exceed 0.125 inch (125 thousandths).
This modification does not change the idle mixture, rather this
modification is done to control the clearance of the throttle plate to
throttle bore. This clearance is important to minimize or eliminate bog
from a stop.
Once the idle circuit has been tuned it is time to direct attention to the
main metering circuit. IF A MORE RADICAL CAM HAS BEEN INSTALLED, a vacuum
gauge should be connected, and a reading of idle vacuum obtained. If the
idle vacuum is less than 12 inches Hg. then it will be necessary to install
a weaker spring on the power-valve actuating-valve. A kit with a number of
different calibrated springs is available from The Carburetor Shop LLC. The
purpose of changing the spring is to allow the power valve to remain closed
at high vacuum cruise and open at W.O.T. Once the power valve is operating
properly, one can calibrate the main jetting of the center carburetor. This
is best done with one of the portable air fuel ratio meters. Both the main
jets and power valve should be calibrated on the center carburetor.
Once the idle, main metering, and power circuits have been calibrated on
the center carburetor, one may install the two end carbs and tune them for
W.O.T. Again, this is best accomplished with the use of an air fuel ratio
meter. Idle and cruise settings of the center carburetor SHOULD NOT CHANGE
when the end carbs are installed. If installation of the end carbs change
either the idle or cruise settings, then there are probably throttle shaft
clearance or adjustment issues with the end carbs. REMEMBER TO ADJUST THE
FRONT TO REAR ROD SO THAT THE FREE END IS IN THE CENTER OF THE HORIZONTAL
SLOT! FAILURE TO DO SO WILL CREATE IDLE ISSUES!
|
|
|
Different applications will have different needs for air/fuel (power or
economy). These settings will be left to the tuner; but I would highly
suggest consultation with one’s engine builder for suggested ratios.
The sales pitch: repair kits with the proper gaskets, leather accelerator
pumps, power valves, etc., as well as additional jets, power valves, vacuum
spring kits, and other parts may be obtained through The Carburetor Shop
LLC.
|